IKEA PAX Assembly Tips — And Why Long Island Homeowners Hire Pros

The Most Underestimated IKEA Purchase
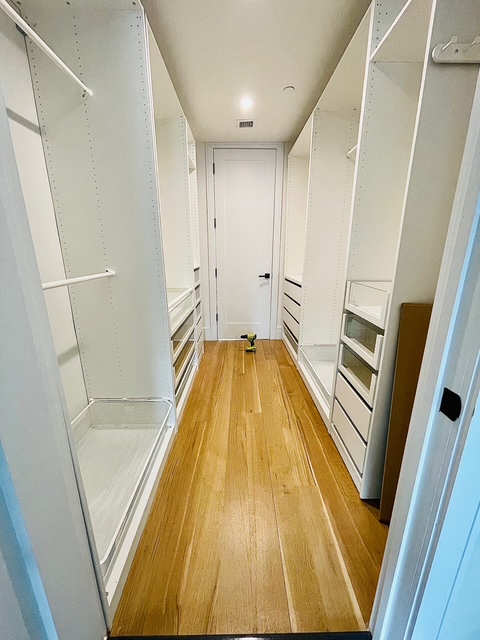
The IKEA PAX wardrobe system is one of the most popular storage solutions on the market — and one of the most frequently abandoned mid-assembly. Every week I get calls from Long Island homeowners who are somewhere between frustrated and defeated. Panels in the wrong order. Rails that won't fit. Doors hanging at odd angles. A pile of leftover hardware they can't explain.
PAX is a genuinely excellent product when it's assembled correctly. The problem is that "correctly" takes experience, patience, and the right tools. This guide covers the tips that will actually save you from the most common mistakes — and helps you figure out whether this is a job you want to tackle yourself.
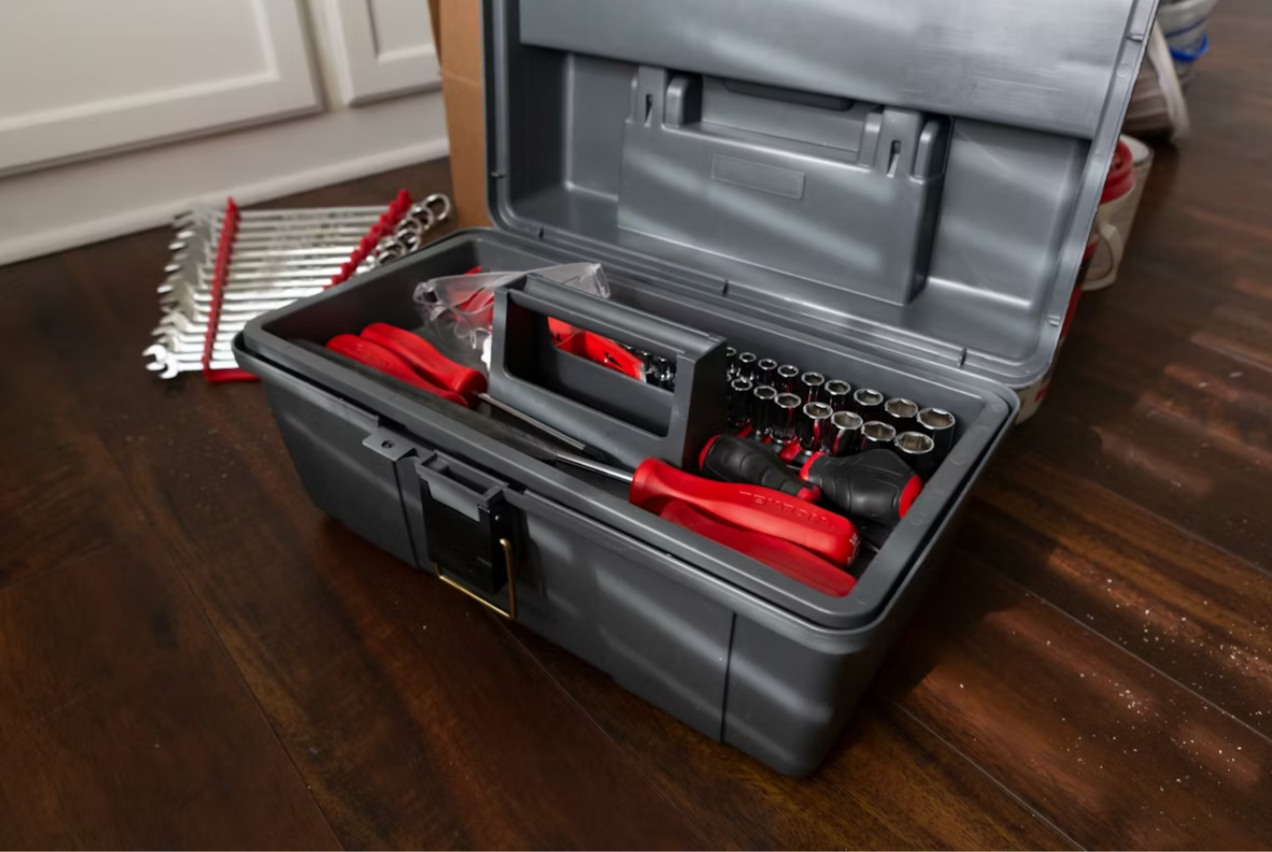
Before You Open a Single Box: What You Actually Need
IKEA provides the cam lock hardware and instructions. That's it. Before you start, make sure you have:
- A rubber mallet — Hammering cam locks with a regular metal hammer cracks the panels. A rubber mallet gives you the force you need without the damage.
- A power drill with a Phillips bit — You'll drive 80 to 150 screws depending on your configuration. A manual screwdriver will destroy your wrist and your patience.
- A proper bubble level — Phone level apps are not accurate enough for a wardrobe that stands 93 inches tall. A small off-level issue at the base becomes a major alignment problem at the top.
- A second person — PAX frames are 93 inches tall and weigh 50 to 80 lbs fully assembled. You cannot safely tip one upright alone.
- Adequate floor space — You need enough room to lay the frame completely flat during the main assembly phase.
Read the full instruction booklet before you start. The PAX assembly sequence is specific, and skipping ahead or doing steps out of order almost always means disassembly and starting over.
Tip 1: Inventory Everything Before You Start
Each PAX box contains specific components listed in the parts manifest. Before touching a single panel, lay everything out and cross-reference with the list. Identify any missing cam locks, drawer slides, hinge plates, or rail hardware now — before you're three hours in and realize a critical piece is absent.
IKEA will ship replacement parts for free in most cases. It's far easier to deal with this before assembly than after.
Tip 2: Assemble the Frame Flat on the Floor
This is where most first-timers make their first mistake. Do not try to build the frame upright. Assemble the back, sides, and bottom panel while the frame is lying flat on the floor — this is the correct sequence per the instructions, and it makes everything easier and safer.
Only tip the frame upright after the main structure, including the back panel, is fully complete and all cam locks are tightened.
When tipping the frame up, have your second person positioned to support the weight from below as it comes vertical. Control the lean — don't let it fall forward. Lower gently onto the feet.
Tip 3: The Back Panel Is Structural — Do Not Skip It
Many people either skip the back panel entirely or attach it loosely, treating it as decorative. It is not decorative. The back panel is what prevents the frame from racking — that is, leaning to the left or right. A racked frame causes drawers to stick, doors to hang unevenly, and the entire unit to feel unstable.
Attach the back panel completely and correctly while the frame is still flat on the floor. Tap every clip or nail into place evenly. Once the frame is upright and the back panel is on, the structure becomes significantly more rigid.
Tip 4: Level the Frame Before Anchoring to the Wall
Once the frame is upright, use the adjustable feet (included with PAX) to bring it level. Use your bubble level on both the side panel and the front face. If the floor is uneven — common in older Long Island homes — you may need to adjust feet to different heights on opposite corners.
After leveling, anchor the frame to the wall using the provided metal mounting rail. This is mandatory for safety. A fully loaded PAX wardrobe — with clothes, shoes, and accessories — can easily reach 150 to 200 lbs. On any wall in a Long Island home, that needs to be anchored into studs.
For plaster walls: locate the wood lath or studs behind the plaster before drilling. Use the appropriate anchors or toggle bolts if studs aren't accessible at the required location.
For brick or concrete: use masonry anchors and a hammer drill. Do not attempt this without the correct tools.
Tip 5: Install Interior Fittings Before the Doors
Install shelves, drawer units, pull-out rails, and hanging rails after the frame is anchored but before you hang the doors. It's much easier to work inside an open frame than around a door. Check that every drawer opens and closes smoothly before moving on.
Tip 6: Hang Doors Last — and Expect Adjustment Time
PAX doors — both hinged and sliding — require careful adjustment at installation. The hinges have three adjustment points: vertical, horizontal, and depth. The sliding door track must be perfectly level or the doors will slide toward one end on their own.
Always hang doors after the frame is fully anchored, level, and loaded with interior fittings. A frame that shifts slightly after you load it with contents will throw off door alignment if you hung them before loading.
For sliding doors: install the top track first with a level. Hang both panels. Then install the bottom guide channel. Step back and watch the doors slide — they should glide evenly with no drift.
The Most Common PAX Assembly Mistake
Assembling the back panel after the frame is already upright, at which point the frame has racked. Now you're trying to force a perfectly square panel into a parallelogram-shaped frame. The cam locks won't tighten correctly, the panel bows, and you'll fight it for an hour before giving up or starting over.
Fix: Back panel goes on flat on the floor, before anything else.
How Long Does IKEA PAX Actually Take?
Here are honest estimates based on regular PAX assembly work across Long Island:
| Configuration | First-Timer Estimate | Professional Time |
|---|---|---|
| Single 1-door frame, no interior | 2–3 hours | 45–60 minutes |
| Double 2-door frame with drawers | 4–6 hours | 1.5–2 hours |
| 3–4 frame walk-in system | Full day or more | 3–4 hours |
| PAX with sliding doors (add to above) | +1–2 hours | +30–45 minutes |
These aren't exaggerated. PAX instructions are dense, the hardware is repetitive, and small mistakes compound. A full walk-in closet system with interior fittings and sliding doors is a serious all-day project for two people.
When It Makes Sense to Hire a Professional Assembler
Consider hiring a professional if:
- You're building 2 or more PAX frames connected side by side
- You're installing sliding doors
- You don't have a second person available
- Your walls are plaster, brick, or anything other than standard drywall
- You've already hit a problem mid-assembly that you can't resolve
- You have better things to do on a Saturday
Professional IKEA PAX Assembly on Long Island
As the owner of TopTier Mounting & Assembly, I assemble IKEA PAX systems regularly for homeowners across Long Island — Port Jefferson Station, Saint James, East Setauket, Stony Brook, Ronkonkoma, Selden, and surrounding communities.
Here's what professional assembly looks like:
- Arrival with all tools — rubber mallet, power drill, level, stud finder
- Full parts inventory before anything starts
- Frame assembled flat on floor with back panel correctly installed
- Frame tipped, leveled with shims if needed, anchored to wall studs
- All interior fittings installed — shelves, drawers, pull-outs, rails
- Doors hung and fully adjusted — hinged or sliding
- Final quality check on every drawer, door, and connection
- All packaging broken down and removed
Most single or double PAX configurations are done in under 2 hours. A full walk-in system typically takes 3 to 4 hours.
We also handle all other IKEA assembly — not just PAX. From BESTA entertainment units to KALLAX shelving, we assemble furniture from any retailer, any brand, any configuration.
Call (718) 598-7838 or contact us online for a free quote. Same-day and next-day scheduling available.